30 abril 2012

Sweet Birthday for you


Supplies Needed:
Psp
Tube of choice. I am using by Celine, you can purchase Celine tubes: here
Scrap kit (PTU) by Bibis Collections part of a store collab: here. Free Gift free gift for $10 of purchase
Gem Mask 71 here
Xenofex 2  - Constelation
Font here


Open a new image: 650x650
With the magic wand click inside. 
Open BIBIHAPPYBDAY PAPERS (1), copy and paste into selection. Deselect.

Effects - Distortion Effects - Ripple:
Effects - Plugins - Xenofex 2 - Constellation.

Apply the mask: gemsmasks-71. Merge group. Duplicate and apply constellation again.
with the eraser tool remove the stars you don't want.

Open: BIBIHAPPYBDAY ELEMENTS (35). c/p in the canvas, Resize at 70 percent. Place in the center.
Click inside with the magic wand. Selections - Modify - Expand by 3.

Open: BIBIHAPPYBDAY PAPERS (2). c/p in the canvas, move the layer below the frame. Selections - Invert. 
Edit - clear. Deselect.

Open the tube, c/p in canvas, resize if needed. Duplicate. Apply Gaussian Blur:
Radius: 3

In the layer palette, change the blend mode to: Screen. Low the opacity to: 80.

Select the original tube layer and apply shadow:
V: -2 H: 3
O: 35 B: 6

Open: BIBIHAPPYBDAY ELEMENTS (19).Resize at 50 percent - Smart Size. Image - Flip.
Place it at the end of the tube. Duplicate. Image - Mirror.

Open: BIBIHAPPYBDAY ELEMENTS (4).Resize at 50 percent - Smart Size. Image - Flip.
Place it at the end of the tube. Duplicate. Image - Mirror.

Add and arrange these elements in the bottom of the tube:
BIBIHAPPYBDAY ELEMENTS (1)
BIBIHAPPYBDAY ELEMENTS (5)
BIBIHAPPYBDAY ELEMENTS (6)
BIBIHAPPYBDAY ELEMENTS (8)
BIBIHAPPYBDAY ELEMENTS (16)
BIBIHAPPYBDAY ELEMENTS (22)
BIBIHAPPYBDAY ELEMENTS (23)
BIBIHAPPYBDAY ELEMENTS (27)
BIBIHAPPYBDAY ELEMENTS (28)
BIBIHAPPYBDAY ELEMENTS (31)
BIBIHAPPYBDAY ELEMENTS (36)
BIBIHAPPYBDAY ELEMENTS (38)

Others elements used in the tag:
BIBIHAPPYBDAY ELEMENTS (15)
BIBIHAPPYBDAY ELEMENTS (37)

Resize, sharpen and place as desire. Apply shadow:
V: -1 H: 3
O: 25 B: 6

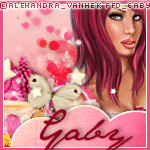
Add your name and copyright. Merge Visible, copy and paste as new image. Export as a png or jpg.
You're done :)

Cherish the happy moments


Supplies Needed:
Psp
Tube of choice. I am using one by Anna Marine, you can purchase the tube: here
Scrap kit Tea Party Dream (PTU) by Jackie's Jewels. You can find it here
Forum set template 004 by me in PSP here and PSD here  **new link here
Animation by Janice : Soft pink floates  here
Font here


Open the template. Duplicate the file and close the original.
Delete the layer:
Credits

Replace the layer: background with the Paper1. 
Replace the layer: clouds with the Paper8. 
Selections - Modify - Expand by: 2 pixels.

Make a gradient with two colors of your choice:
Foreground: #fefbf0
Background: #fceec5

Style: linear
Angle: 45
Repeats: 4
Add a new layer below and floodfill with a the gradient that matchs your tube.

Open the tube or closeup, c/p in your canvas, move it to the left upper cloud.
Select the part you like. Selections  - Invert. Edit - Clear.
In the layer palette, change the blend mode to: Overlay.

Open: CircleScatter. c/p in your canvas.
Open: DottedArt. c/p in your canvas. move it to upper right side. change the blend mode to: Luminance legacy
Open: BalloonBunch. c/p in your canvas. resize at  50 percent. Move it to the right side of the banner.
Duplicate. Image - Mirror.

open: Frame4. c/p in your canvas. Place it in the left side, duplicate. Resize at 50 percent. Image - Mirror and place it.

Open: Flower3. c/p in your canvas. Resize at 50 percent. Place it above the balloons, Duplicate. Image - Mirror.

Open, C/p in the canvas, resize and place them in the right side of the banner: 
bird
bow1
EnvelopewithStars
flower2
flower4
flower6

Elements I've used in the left side:
Butterfly2
Cupcake
flower1
flower2
Flower4
JarofStars1
Raspberry1
Raspberry2
Squirrel
Stars 
SugarBowl
Swirl1
Sparkle

Apply Drop shadow:
V: 0 H: 2
O: 35 B: 7

Open the tube, c/p in your canvas. Resize if needed. Place it in the center. 
Apply Drop shadow:
V: 0 H: 3
O: 55 B: 5

Activate: wordart1. Selections - Float - Defloat. Add a new layer and floodfill with the color:

Apply Drop shadow:
V: -1 H: 2
O: 60 B: 5

Color: #4d0102

Activate: wordart2. Selections - Float - Defloat. Add a new layer and floodfill with the color:

Apply Drop shadow:
V: -1 H: 1
O: 60 B: 2

Color: #4d0102

Add a new layer flood fill with the color: #e45384. Selections - Modify - Contract by: 3 pixels.
Floodfill with the gradient used before. Selections - Modify - Contract by: 1 pixel.
Add the copyright and your name. 
Merge the background with all the layers below the tube. 
Merge the tube with all the layers above, included the border

If you want a non animate banner, save now as jpg or png. 

To animate:
Selec the background merged with the elements. Edit - Copy. Open Animation Shop. Paste as a new animation.
Open: 122312softspinV2JEK. the animation has 81 frames. I don't work with so many frame because  it will be a very heavy banner :/
Select the first frame. Go to: Edit - select all. 
Animation - Cull Animation:

Do it again with the same settings or you can remover 1 frame every 3 frames and choose the one you want until you have 21 frames. 
You need to duplicate your background until you have 21 frames. 
Select the first frame. Edit - select all. 
Activate the animation. select the first frame. Edit - select all and drag into the background, place it in the middle left side,
back to the animation, edit - undo, drag to the background place it in the middle center. Do it again but palce it in the middle right side of the banner
Back to psp copy the layer with the tube and elements merged. 
Paste as a new animation. Duplicate until you have 21 frames. Drag and drop in your animation and be careful with the borders. 
Now play the animation and if you like it. Save as gif (=

27 abril 2012

Are you feelin' the music?


Supplies Needed:
Psp
Tube of choice. I am using a PP by Celine, you can purchase Celine tubes: here
Scrap kit (PTU) Sexy Girl by Bibis Collections part of a collab: here
Forum set template 003 by me in PSP here and PSD here **new link here
Penta.com - Jeans here
(Scroll down and download Garbage Collections)
Font here

Open the template. Duplicate and close the original.
delete the layer:
Credits.

Replace the background layer withthe paper: SEXY GIRL PAP (10).

Adjust Add Noise:
Gaussian
Noise: 30 %
Monochrome.

Open: sexygirl elements (32). c/p in the canvas, resize. Place it in the right side.
Open: sexygirl elements (79). c/p in the canvas, resize. Place it in the opposite side.
Open: sexygirl elements (34). c/p in the canvas, resize. Place it above the city buildings.
Open: sexygirl elements (122). c/p in the canvas, resize and place it in the canvas.

activate the layer: slanted rectangles fill. Replace the gradient to match your tube if needed.
Apply: Penta.com - Jeans:

Effects - Artistic Effects - Halftone:
Open the closeup of the tube, copy and paste in the slanted rectangles and change the blend mode;

Open the tube, c/p in the canvas. Resize if needed. Place it in the right side of the banner.
Apply drop shadow:
V: 0 H: 3
O: 70 B: 6

Add elements from the kits to decorate. C/p in the canvas,  resize and place them were you like:
sexygirl elements (2)
sexygirl elements (7)
sexygirl elements (10)
sexygirl elements (22)
sexygirl elements (60)
sexygirl elements (76)
sexygirl elements (81)
sexygirl elements (83)
sexygirl elements (84)
sexygirl elements (90)
sexygirl elements (103)
sexygirl elements (105)
sexygirl elements (106)
sexygirl elements (112)
sexygirl elements (120)
sexygirl elements (126)
sexygirl elements (129)

Apply Drop shadow:
V: 1 H: 3
O: 50 B: 4

Add copyright and your name. 

Open: sexygirl elements (8). Place it in the left bottom corner. With the selection tool or the magic wand select the horn speaker:
Expand by: 3 pixels.

Effects - Distortion Effects - Punch:

Strength: 10 percent

Deselect. Copy Merged .Open Animation Shop. Paste as a new image. Back to psp. Edit - Undo: 2 times. (until you have the expanded selection)

Apply Punch effect again but change the percent to: 20

Deselect, Copy Merged, paste after current frame in Animation Shop. Back to psp, Edit - Undo: 2 times. 

Effects - Distortion Effects - Punch:
Strength: 15

Deselect, Copy Merged, paste after current frame in Animation Shop. 
Back to psp, Edit - Undo: 2 times. Deselect. 
Copy Merged. Paste after current frame in Animation Shop.
You have 4 frames in Animation shop. The last frame is normal, no without an effect.

Copy the fourth frame, and paste (5 or 6 times) after the second frame. 
Copy the second frame and paste after the last frame. Play with the frames to get the effect.

When you're happy with the result. Export as a gif file. I have added another animation in my finished banner

25 abril 2012

Believe in Yourself


Supplies Needed:
Psp
Tube of choice. I am using one by Anna Marine, you can purchase the tube: here
Scrap kit First Day of Spring (PTU) by Jackie's Jewels. You can find it here
Forum set template 002 by me in PSP here and PSD here  **new link here
Animation by Missy: breakaway (pack 5) here

Penta.com here
Plugin: Xero -  Porcelain here
Font here


Open the template.  Duplicate the original file and close. Delete the layer: 
Credits.

Replace the layer: background with the Paper8. 

Replace the layer: middle tag with the paper 1.

Open the tube or closeup, c/p in your canvas, until you have 3 or as many as you like.

With the selection tool with the following settings:

Start to blend the tubes. Like this:
merge the tubes together. 

Select the layer: middle tag. Defloat. Selections - Modify - Expand by 1. 
Activate the tubes layers. Edit - Cut.
Add a layer above the middle tag layer. Edit - Paste into Selection.
Deselect and delete the layer: middle tag.

For the original tubes in the back apply:
Artistic Effects - Aged Newspaper:
Amount to age: 45

In the layer palette change the blend mode to: Overlay. Opacity: 75.

Select the middle tubes layer. Apply Xero - Porcelain:

Apply: Penta.com - color dot:

In the layer palette change the blend mode to: Luminance (Legacy). Opacity: 85.
Activate the layer: middle lines. Change the opacity to: 45.

Open the main tube, c/p in your canvas. Place it in the right side of your canvas.

Apply drop shadow:

V: 0 H: 0
O: 30 B: 10

Open: Frame2. c/p in your canvas. Place it above the tube. 

Open: GrassMound. c/p in your canvas. Move the layer below the tube.
Place it in the left side, duplicate. Image - Mirror.

Open: Birdhouse. Resize at 50 percent. Place it in the upper right side corner.

Open: Tree2. C/p in the canvas. Place it in the left side.

Add elements from the kits to decorate. C/p resize and place them were is desire. I've used:
birds 2 
brushes
butterfly
decoration 1
flower 1, 2 and 3
FlowerBud2
JarofFlowers
LightScatter
Vine


Apply Drop shadow:
V: 2 H: 2
O: 35 B: 5

Add your name and the copyright info. Add a new layer, floodfill with a gradient. 
Selectiosn - Modify contract: 5 pixels. Edit - Clear.
Apply Drop shadow:
V: 2 H: 2
O: 35 B: 5
If you want a non animate banner, save now as jpg or png. 

To animate:
Merge all the layers, except: the background, the two closeup layers and the middle lines.
Edit - Copy. Open Animation Shop. Paste as a new animation.
Open: breakaway_bymissy. the animation has 12 frames.
You need to duplicate your background until you have 12 frames. 
Select the first frame. Edit - select all.
Activate the sparkle. select the first frame. Edit - select all and drag into the background, place it where you like it.

I place mine in the bottom and center. Back to psp copy the layer with the tube and elements merged. 
Paste as a new animation. Duplicate until you have 12 frames. Drag and drop in your animation and be careful with the borders. 
Now play the animation and if you like it. Save as gif (=

Rocker Gurl

Supplies Need
Psp
Tube of choice. I've used a  tube by SkyScraps. Find it here
Scrap kit (PTU) Rocker Gurl by Inzipired Creationz: here
Font here

Open a new image: 650x650.
Open: Frame 3. Resize at 85 percent - Smart Size.
With the magic wand, click inside of the three frames. Selections - Modify - Expand: by 4 pixels.
Open the paper: Paper 17. c/p in the canvas. Selections - Invert. Edit - Clear. Move the layer below the frame.

Apply blinds:

Apply Mosaic - Antique:

Open the closeup of the tube, c/p in the canvas. Place it in one of the frames. Remove the excess of the tube.

In the layer palette, change the blend mode to: hard light.
Open the main tube,c/p in the canvas. Resize if needed. Place it in the right side. Duplicate, Apply Gaussian Blur:
Radius: 3

Change the blend mode to: Soft Light.

Apply shadow to the original tube layer:
V: 4 H: 4
O: 50 B: 7

Open: Skateboard. c/p in the canvas and above the tube to cover the legs.

Add elements from the kits to decorate. C/p resize and place them were is desire. I've used:
Balloon
Boot 2
bow 1
candle
Lights
Lipgloss
lips
microphone
perfume
pillows
sparkles 1
Star n bones
stars
tattoo 2

Apply Drop shadow:
V: -1 H: 3
O: 50 B: 4

Add copyright and your name. Merge Visible, copy and paste as new image. Export as a png or jpg.

23 abril 2012

Bibilicious


Supplies Needed:
Psp
Tube of choice. I've used one by Alexander McMillan and SkyScraps, tube can be found  here
Scrap kit (PTU) Bibilicious by Bibis Collections: here
Mask 356 ny Vix here
Font here


Open a new image: 650x650

open the paper: BIBILICIOUS PAPERS (6). c/p in the canvas.
Layers - Load mask: Vix_mask356 - Merge group.

open: BIBILICIOUS (40). c/p in the canvas, place it where you like.
With the magic wand click inside of the window.
Selections - Modify - Expand by: 5 pixels.

Open: BIBILICIOUS PAPERS (5). c/p in the canvas, resize at 50 percent.
Selections - Invert. Edit - Clear. Selections - Invert again. Move the layer below the frame.

Open the closeup of the tube, c/p in the canvas, move the layer below the frame.
Select the part you like. Selections - Invert. Edit - Clear. Deselect

Add drop shadow to the frame:
V: 2 H: 5
O: 40 B: 5

In the layer palette, change the blend mode of the closeup layer to: Lighten.
Duplicate again and change  to Overlay.

Open the main tube, place it next to the windows. Resize if needed.

Add drop shadow:
V: 3 H: 3
O: 45 B: 5


Open: BIBILICIOUS (1). resize at 70 percent. Move it below the tube.

Open: BIBILICIOUS (12). Place it in the windows.

Open: BIBILICIOUS (22). Place it behind the tube and remove the excess.

Add elements from the kits to decorate. C/p resize and place them were you like:
BIBILICIOUS (13)
BIBILICIOUS (31)
BIBILICIOUS (4)
BIBILICIOUS (5)
BIBILICIOUS (8)
BIBILICIOUS (9)
BIBILICIOUS (44)
BIBILICIOUS (46)
BIBILICIOUS (58)
BIBILICIOUS (62)


Add drop shadow:
V: 0 H: 2
O: 45 B: 5

Add copyright and your name. Merge Visible, copy and paste as new image. Export as a png or jpg.

22 abril 2012

My latex dress


Supplies Needed:
Tube of your choice. I have used one by KiwiFireStorm from The PSP Proyect Store. Find it here
Template 166 by Missy from Divine Intentionz  here
Plugins:
Andrews filter Collection 59 here
Penta.com here
(Scroll down and download Garbage Collections)
Eyecandy 5 Impact (glass)
Eyecandy 4000 (cutout, gradient glow)
Font here


*C/p means Copy and paste as a new layer in your current canvas.
*Replace the original layers by: Selections - Select all. Selections - Float. Selections - Defloat. and add a new layer. Always delete the original layer, unless otherwise stated.


Open the template. Duplicate the file and close the original.
Delete the layer:
by missy

*If you want, now you can go to: Image - Mirror and do this for every layer of the template.

Make a gradient with two colors from the tube. my choice: 
Foreground: #26378b
Background: #47b2e0

Angle: 0
Repeats: 0
Style: linear
Invert: uncheked

Select the layer: circle.
Floodfill with the gradient, do not deselect. 
Apply: Andrew's Filter Collection 59 - In the line of:
Colorize to match your tube.. if is needed.

Adjust - Hue and Saturation - Colorize:
Hue: 150
Saturation: 160

Apply blinds:

Apply Eyecandy 5 Impact - Glass:

Deselect. In the layer palette, change the blend mode to: Luminance.

Select the layer: rectangle1
Floodfill with the gradient, do not deselect. 

Apply: Penta.com - jeans:
Amount: 28
border width: 6

Open  the closeup of the tube, c/p in the canvas, select the part you like and place it above the rectangle.
Selections - Invert. Edit - clear. Deselect.

Effects - Texture Effects - Emboss.

Select the layer: rectangle2.
Floodfill with the gradient, but change the settings to:
Angle: 45
Repeats: 2
Style: linear
Invert: uncheked

Do not deselect.

Apply: Andrew's Filter Collection 59 - In the line of.
Same settings used. Colorize if is needed. 

Open  the closeup of the tube, c/p in the canvas, select the part you like and place it above the rectangle.
Selections - Invert. Edit - clear. Deselect.

Colorize the tube. In the layer palette, change the blend mode to: Darken.

Select the layer: small circle.

Floodfill with the gradient, but change the settings to:
Angle: 0
Repeats: 0
Style: sunburst
Invert: checked

Apply: Penta.com - jeans:
Value: 90
Amount: 11
Color R, G and B : 255

Apply: Eyecandy 4000 - Cutout:

Select the layer: dotted circle.
Replace with the color: #47b2e0

Add noise:
Random
Noise: 75 %
Monochrome

Apply - Eyecandy 4000 - Gradient glow:


Apply the same gradient to the vertical rectangle layer.

Select the big circle layer. Duplicate and apply to the original:
gaussian blur:
Radius: 10

Effects - Texture Effects - Mosaic Antique:

Open your main tube, c/p in the canvas. If it is possible place it above the small circle layer. Like if it is sitting.
Apply drop shadow:

V: 1 H: 3
O: 50 B: 6

Add copyright and your name. Merge Visible, copy and paste as new image. Export as a png or jpg.

19 abril 2012

Enchanted dreams of a fairy


Supplies Need
Psp
Tube of choice. I've used a  fairy poser from the kit
Scrap kit (PTU) Enchanted Dreams by Inzipired Creationz: here
Font here


Open a new image: 650x650
Open: grass 1. c/p in the canvas. Image - Mirror.
Open: door 2. c/p in the canvas. Resize at 50 percent. Move the layer below the grass and place the door to the left side.
Open: Owl. c/p in the canvas. Resize at 50 percent. (x2) Place it in the top of the door.
Open: Clouds 1. c/p in the canvas. Resize at 60 percent. (x2) Place it in right upper side of the canvas. 
Duplicate and  Resize at at 80 percent. Place it above and near the door.
Open: Sparkles 1. c/p in the canvas. Resize at 50 percent. Image - Mirror. Image - Flip. Place it above the big cloud.
Open: Moon 1. c/p in the canvas. Resize at 45 percent. (x2) Place it between the clouds.
Open: Unicorn. c/p in the canvas. Resize at 50 percent. Place it next to the door.
Open: Wordart 2. c/p in the canvas. Resize at 50 percent. Place it in the grass.
Open: Fairy 2. c/p in the canvas, resize if desire. Place it almost in the middle.

Apply shadow:
V: 1 H: 3
O: 45 B: 5

Resize, sharpen and place as desire. Elements to finish with your tag:
Birdhouse
Flower 1 and  3
Lantern 1
Moon and Cat
Mushroom 1, 3 and 4
Umbrella

Apply shadow to the elements of your choice:
V: 0 H: 4
O: 45 B: 6

Add the copyright info and your name. Merge visible. Copy, paste as new image. Save as png or jpg.
You're done with it!!

18 abril 2012

Frühling in Paris


Supplies Needed:
Psp
Tube of choice. I am using one by Barbara Jensen, you can purchase the tube: here
Scrap kit First Day of Spring (PTU) by Jackie's Jewels. You can find it here
Wordart by me here
Font here

Open a new image: 600x600

Open: Frame4. c/p in the canvas. Resize at: 75 percent - Smart Size.
Select the Ellipse Tool with the settings:
Foreground color: white
Background: null

Make a circle around the frame like this:

Convert to raster layer. Duplicate. Resize at 90 percent - Smart Size. Merge Down.
Add Noise:
Uniform
65 %
Monochrome

Lower the opacity of the layer to: 55. With the magic wand, click inside of the circle.
Selections - Modify - Expand: 10 pixels.
Open: paper 6. c/p in the canvas. Resize at: 50 percent - Smart Size.
Selections - Invert. Edit - Clear. Deselect.
Send the layer to the bottom.

Apply shadow to the circles:
V: 0 H: 2
O: 40 B: 4


Open: FlowerScatter. c/p in the canvas. Resize at: 50 percent - Smart Size.
Image - Free rotate: Right - 45 Degress.

Place it in the top of the frame.

Open: Bow1, Flower1, Flower2 and Flower3. c/p in the canvas. Resize at: 50 percent - Smart Size. (2x)
Place it above the scatter.

Open: FlowerStem. C/p in the canvas. Resize at: 60 percent - Smart Size. Image - Mirror. Place it in the right side of the frame.
Open: FlowerBud1 and FlowerBud2. C/p in the canvas. Resize at: 50 percent - Smart Size. Image - Free rotate: Right - 20 Degress.
Place it in the stern.

open the tube. C/p in the canvas. Resize if is needed. Arrange it in the image.
Apply Drop shadow:
V: 4 H: 5
O: 40 B: 6

Add elements from the kits to decorate. C/p in the canvas,  resize and place them were you like:
Bear
bird1
Bird2
Butterflies
Feather
Pillow

Apply Drop shadow:
V: 0 H: 4
O: 25 B: 7

Add the wordart. c/p in the canvas, Send to bottom, Duplicate the layer. arrange the layer between the frame and the paper. Change the blend mode to: Overlay.
With the eraser tool remove the excess of the wordart outside the frame.
From this:

To this:

Deselect. Apply Drop shadow:
V: 2 H: 2
O: 50 B: 4

Add copyright and your name. Merge Visible, copy and paste as new image. Export as a png or jpg.

17 abril 2012

Gugu Stalker


Supplies Needed:
Psp
Tube of choice. I've used a freebie tube by Xeracx, tube can be found  here
Scrap kit (PTU) Emo Gugu by Bibis Collections: here
Font here


Open a new image: 600x600. 
Activate the rectangle tool and make a big rectangle in your canvas.
Settings:

Click inside with the magic wand. Expand by 3 pixels. Open: EMO GUGU PAPERS (5). c/p in the canvas, resize at 50 percent - Smart size.
Duplicate the layer. Apply Gaussian Blur:
Radius: 4
Apply Texture Effects - Polished Stone:
Change the blend mode to: Screen.

Selections - Invert. Remove the excess of the paper. Selections - Invert.

Open: EMO GUGU ELEM (66).Resize to fit inside of the rectangle. selections - Invert. Deselect.

Open the tube, c/p in the canvas. Resize if needed. Place it in the left side. Duplicate, Apply Gaussian Blur:
Radius: 3

Change the blend mode to: Soft Light.

Apply shadow to the original tube layer:
V: -1 H: 4
O: 30 B: 6

Open: EMO GUGU ELEM (17). c/p in the canvas. Resize at 70 percent - Smart Size. Move it to the right upper corner.
Duplicate and place it in the left bottom corner.

Add elements from the kits to decorate. C/p resize and place them were is desire. I've used:
EMO GUGU ELEM (5)
EMO GUGU ELEM (19)
EMO GUGU ELEM (25)
EMO GUGU ELEM (38)
EMO GUGU ELEM (43)
EMO GUGU ELEM (44)
EMO GUGU ELEM (50)
EMO GUGU ELEM (61)
EMO GUGU ELEM (62)
EMO GUGU ELEM (90)
EMO GUGU ELEM (93)

Apply Drop shadow:
V: 0 H: 2
O: 40 B: 4

Add copyright and your name. Merge Visible, copy and paste as new image. Export as a png or jpg.

I'm fabulous


Supplies Needed:
Tube of choice. I've using the art of Carlos Reis.  Available at The PSP Project Store. Find the tube here
Forum set template 001 by me in PSP here and PSD here  **new link here
Animation by Lovey: 2 whiteswirl here
Plugins: AAA Filters - Good Vibrations here
Funhouse - Chaos Mirror 
Eye Candy  4000 - Gradient glow
Font here and here


Open the template. Duplicate and close the original.
delete the layer:
Credits.

Select the back layer and floodfill with a color from your tube.
Open the close up of the tube, c/p in the canvas until the background is cover. merge those layers:
Apply Gaussian Blur:
Radius: 7 (or 8)

Effects - Plugins - AAA Filters - Good Vibrations:
Apply Again but select Darken instead of Lighten.

Duplicate the layer. Effects - Plugins - Funhouse - Chaos Mirror:
Uncertainty: 35

Note: to have a good effect you may have to vary the number to suit with your tube.

In the layer palette: Change the blend mode of the layer to: Overlay and low the opacity to: 60.

Activate the layer: Fill of Mid Rectangle. Selections - All. Float - Defloat.
Open the closeup again, c/p in the canvas. Duplicate. Move to the mid rectangle the part you like and merge down.
Selections  - Invert. Edit - Clear. Deselect.
In the layer palette: change the blend mode to: Luminance. Apply blinds:

Activate the layer: dot border. Apply - Eye Candy 4000 - Gradient Glow:

Select the Color tab and in the menu, select: Fat but change the settings.
apply shadow to:
Half Circles
Mid Rectangle
border

Drop Shadow:
V: 2 H: 2
O: 50 B: 5

Select the layer: Wording 2
Apply Inner Bevel:
Apply shadow:
V: 1 H: 3
O: 55 B: 3

Open the main tube, c/p in the canvas. Place it in the center. Resize if desire.
Apply Shadow:
V: 2 H: 4
O: 50 B: 6

Add your name and copyright.
You can:  Export as a png or jpg.

Or you can animate (;
To animate:

Close all the layers, except the color background, background with filters and the duplicate background, Half Circles and mid rectangle.
Copy Merged.

Open Animation Shop. Paste as a new animation.
Open: 2-whiteswirl-lovey10.mng. the animation has 21 frames.
You need to duplicate the image until you have 21 frames.
Select the first frame. Edit - select all.
Activate the white swirl. select the first frame. Edit - select all and drag it to the background, place it where you like it.
I've placed mine in the center.
Back to psp, close the layers opened. Open all the others layers, copy merged. Paste as a new animation.
duplicate until you have 21 frames. Drag and drop in your animation and be careful with the borders.
Now play the animation and if you like it. Save as gif (=