Supplies Needed:
Psp and Animation Shop
Tube of choice. Art by Deborah Grieves. Purchase the tube: here
Plugins:
Eye candy 3.1
Xero Plugin here
Xenofex 2
Font here
Open the template. Duplicate the file and close the original.
Delete the layer: credits
make a gradient with two colors:
foreground: #1c617d
background : #09153e
angle: 0
repeats: 6
Invert: unchecked.
Activate the layer: main background.
flood fill with the gradient.
Effects - Plugins - Eye Candy 3 - Jiggle:

Add another layer, flood fill with the gradient.
Effects - Plugins - Eye Candy 3 - Jiggle:

In the layer palette change the blend mode to: Hard Light.
Adjust - Add/Remove Noise - Add Noise:
Random
10 percent
Monochrome
Activate the main background, duplicate and move to the top.
change the blend mode to hard light too. Rename it: Bling
Activate the layer: frame back 1.
Change the color for one of your choice, I leave mine grey.
Selections - All - Float - Defloat.
Open the tube or close up, copy and paste as a new layer, place it above the background.
Selections - Invert. Edit - Clear. Deselect.
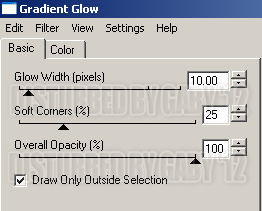
Effects - Plugins - Xero - Radiance:

Repeat for the layer: frame back 2.
Activate the layer: small frame 1.
Selections - All - Float - Defloat.Delete the original layer.
Add a new layer and flood fill with the color: #053d59.
Adjust - Add/Remove Noise - Add Noise:
Uniform
57 percent
Monochrome
Add drop shadow:
V: 3 H: 3
O: 80 B: 6
Repeat for the layer: small frame 2.
Activate the layer: rectangle.
Selections - All - Float - Defloat.Delete the original layer.
Add a new layer and flood fill with the color: #053d59.
Effects - Texture Effects - Blinds:

Add drop shadow:
V: 3 H: 0
O: 70 B: 4
Open the tube, c/p in the canvas, place it in the right side.
Apply shadow if you like.
Change the colors of the frames, I've added noise to the frame: 1.
Add the copyright info and your name.
To animate:
Activate the layer: Blings.
Effects - Plugins - Xenofex 2 - Constellation:

Copy merged. Open Animation shop.
Paste as a new animation. Back to psp, undo the effect and apply again
but hit the random seed button. Copy merged, in animation shop paste after current frame.
Repeat one more time. Change the speed to: 15
Play the animation, if you like it, save!
You're done :D