Mostrando entradas con la etiqueta Celine Pinup. Mostrar todas las entradas

10 julio 2013

Oh so sensual & wild


Supplies Needed:
Psp & Animation shop
Tube of choice. Art by Zlata Ma, the tube is available here
Scrap kit Urban Jungle (PTU) by Inzpired Creationz here
Animation 117 by Simone here 
Plugins:
Eye candy 4000
Font here


Open a new image: 600x550.
Open: Halftone 1. C/p in the canvas, resize at 65 percent - Smart Size. 
Place it in the top left side.

Open: Grunge Smears 1. C/p in the canvas, resize at 75 percent - Smart Size. 
Place it in the top left side.

Open: Grunge Smears 2. C/p in the canvas, resize at 60 percent - Smart Size. 
Place it in the bottom center.

Open: Scattered Bling 1. C/p in the canvas, resize at 75 percent - Smart Size. 
Place it in the top center.

Open: Hearts On A String 2. C/p in the canvas, resize at 45 percent - Smart Size. 
Place it in the top left.

Open: Stars 1. C/p in the canvas, resize at 60 percent - Smart Size. 
Place it in the top right.

Open: City Scene. C/p in the canvas, resize at 75 percent - Smart Size. 
Place it in the center.

Open: Ribbon 2. C/p in the canvas, resize at 55 percent - Smart Size. 
Place it in the bottom left.

Open: Lips 3. C/p in the canvas, resize at 55 percent - Smart Size. Twice.
Place it in the bottom left.

Open: Gun. C/p in the canvas, resize at 40 percent - Smart Size. 
Place it in the left side.

Open: Tiger. C/p in the canvas, resize at 70 percent - Smart Size. 
Place it in the bottom left.

Open the tube, C/p in the canvas, resize if it's needed and place it in the right side.
Effects - Plugins - Eye Candy 4000 - Shadowlab:


Open: Flower 2. C/p in the canvas, resize at 50 percent - Smart Size. Twice.
Place it in the bottom center.

Open: Tulle 2. C/p in the canvas, resize at 45 percent - Smart Size. 
Image - Flip. Place it in the bottom right.

Open: Hearts On A String 1. C/p in the canvas, resize at 50 percent - Smart Size. 
Place it in the right side.

Open: Purse. C/p in the canvas, resize at 45 percent - Smart Size. 
Place it in the bottom center.

Open: Heart 1. C/p in the canvas, resize at 45 percent - Smart Size. 
Place it in the bottom right.

Open: Boot 2. C/p in the canvas, resize at 45 percent - Smart Size. 
Image - Mirror. Place it in the bottom right.

Open: Lipstick.  C/p in the canvas, resize at 55 percent - Smart Size. Twice.
Place it in the bottom center.

Open: Perfume. C/p in the canvas, resize at 40 percent - Smart Size. 
Place it in the bottom center.

Open: Button 3. C/p in the canvas, resize at 45 percent - Smart Size. 
Place it in the bottom right.

Sharpen the elements and apply shadow.
Effects - Plugins - Eye Candy 4000 - Shadowlab:

Add the name and copyright info.

To animate:

Close all the layers above the tube (with this layer included)
Merge visible all the open layers. Rename it: 1. Copy.

Open animation shop and paste as a new animation. Duplicate until you have 18 frames.

Open: SimoneAni117.mng
Activate the first frame, select all. 
Animation - Cull Animation - Remove 1 frame every 4 frames.
Drag into the tag and place it twice, iin the right side.

Back to psp. Close the layer 1 and open the closed layers. 
Copy and paste as a new animation in animation shop.
Duplicate until you have 18 frames.
Activate the first frame, select all. Drag into the tag and place it where it belongs.

**Adding a background to the transparent animation.

Animation - Animation Properties
Change the back color for the color of your choice, mine is white.
Apply and the color will be applied in all the frames selected.

Change the speed to: 11, play the animation and save if you like! :)

29 junio 2013

Kiss me, then I'll be yours


Supplies Needed:
Psp & Animation shop
Tube of choice. Art by Celineart, the tube is available here
Scrap kit American Girl (PTU) by Bibis Collection here
Animation 496 by Simone here
Plugins:
Eye candy 4000
Font here


Open a new image: 500x600.
Open: BIBISABINAKELLEY ELEM (8). C/p in the canvas, resize at 80 percent - Smart Size. 
Place it in the center.

Open: BIBISABINAKELLEY ELEM (25). C/p in the canvas, resize at 80 percent - Smart Size. 
Place it in the center.

Open: BIBISABINAKELLEY ELEM (54). C/p in the canvas, resize at 55 percent - Smart Size. 
Place it in the bottom left.

Open: BIBISABINAKELLEY ELEM (64). C/p in the canvas, resize at 65 percent - Smart Size. 
Place it in the bottom right.

Open: BIBISABINAKELLEY ELEM (39). C/p in the canvas, resize at 60 percent - Smart Size. 
Place it in the center.

Open: BIBISABINAKELLEY ELEM (83). C/p in the canvas, resize at 55 percent - Smart Size. Twice.
Place it in the top right.

Open the tube, c/p in the canvas, resize if it's needed and place it in the right side.
Effects - Plugins - Eye Candy 4000 - Shadowlab:

Open: BIBISABINAKELLEY ELEM (9). C/p in the canvas, resize at 70 percent - Smart Size. Twice.
Place it in the center.

Open: BIBISABINAKELLEY ELEM (42). C/p in the canvas, resize at 45 percent - Smart Size. Twice.
Image - Mirror. Place it in the left side.

Open: BIBISABINAKELLEY ELEM (3). C/p in the canvas, resize at 40 percent - Smart Size. Twice.
Image - Mirror. Place it in the bottom right.

Open: BIBISABINAKELLEY ELEM (67). C/p in the canvas, resize at 60 percent - Smart Size. Twice.
Place it in the bottom center.

Open: BIBISABINAKELLEY ELEM (91). C/p in the canvas, resize at 55 percent - Smart Size. Twice.
Place it in the bottom center.

Open: BIBISABINAKELLEY ELEM (126). C/p in the canvas, resize at 55 percent - Smart Size. Twice.
Place it in the bottom right.

Open: BIBISABINAKELLEY ELEM (75). C/p in the canvas, resize at 40 percent - Smart Size. 
Place it in the bottom right.

Open: BIBISABINAKELLEY ELEM (95). C/p in the canvas, resize at 55 percent - Smart Size. 
Place it in the bottom left.

Open: BIBISABINAKELLEY ELEM (88). C/p in the canvas, resize at 60 percent - Smart Size. 
Place it in the bottom left.

Open: BIBISABINAKELLEY ELEM (72). C/p in the canvas, resize at 50 percent - Smart Size. 
Place it in the bottom left.

Open: BIBISABINAKELLEY ELEM (118). C/p in the canvas, resize at 45 percent - Smart Size. Twice.
Place it in the bottom center.

Open: BIBISABINAKELLEY ELEM (73). C/p in the canvas, resize at 60 percent - Smart Size. Twice.
Place it in the bottom left.

Open: BIBISABINAKELLEY ELEM (90). C/p in the canvas, resize at 65 percent - Smart Size. 
Image - Mirror. Place it in the bottom right.

Open: BIBISABINAKELLEY ELEM (92). C/p in the canvas, resize at 50 percent - Smart Size. 
Place it in the bottom left.

Open: BIBISABINAKELLEY ELEM (140). C/p in the canvas, resize at 45 percent - Smart Size. 
Place it in the bottom left.

Open: BIBISABINAKELLEY ELEM (80). C/p in the canvas, resize at 60 percent - Smart Size. 
Place it in the bottom right.

Open: BIBISABINAKELLEY ELEM (130). C/p in the canvas, resize at 55 percent - Smart Size. Twice.
Place it in the bottom right.

Sharpen the elements and apply shadow.
Effects - Plugins - Eye Candy 4000 - Shadowlab:

Add the name and copyright info.


To animate:
Copy merged the tag. Open animation shop: 
Paste as a new animation and duplicate until you have 16 frames.

Open: SimoneAni496-PSD.psd
Activate the first frame, select all.
Drag into the tag and place it three times in the tag.


**Adding a background to the transparent animation.

Animation - Animation Propieties
Change the black color for the color of your choice, mine is white.
Apply and the color will be applied in all the frames selected.

Change the speed to: 12, play the animation and save if you like! :)

23 junio 2013

American Sweetheart


Supplies Needed:
Psp & Animation shop
Tube of choice. Art by Celineart, the tube is available here
Scrap kit American Girl (PTU) by Toxic Desirez here
Animation 473 by Simone here
Plugins:
Eye candy 4000
Color Efex Pro 3.0
Font here


Open a new image: 650x550.
Open: Kristin - American Girl - Splatter. C/p in the canvas, resize at 55 percent - Smart Size. 
Place it in the top right. Duplicate. Image - Mirror. Image - Flip. Arrange it in the bottom left.

Open: Kristin - American Girl - Discoball. C/p in the canvas, resize at 75 percent - Smart Size. 
Place it in the center.

Open: Kristin - American Girl - Frame 3. C/p in the canvas, resize at 75 percent - Smart Size. 
Place it in the center.

Open: Kristin - American Girl - Wire. C/p in the canvas, resize at 95 percent - Smart Size. 
Place it in the center.

Open: Kristin - American Girl - Frame 1. C/p in the canvas, resize at 80 percent - Smart Size. 
Place it in the center. With the magic wand click inside of the frame and expand the selection: 5 pixels.

Open: Kristin - American Girl - Paper 4. C/p in the canvas, resize at 85 percent - Smart Size.
Place it below the frame. Selections - Invert. Edit - Clear. Selections - Invert.

Open the tube, c/p in the canvas, resize if it's needed and place it in the center.
Selections - Invert. Edit - Clear. Deselect. 

Duplicate the tube layer and apply to the copy:
Effects - Plugins - Nik Software - Color Efex Pro 3.0:
*click to see it full size*

 In the layer palette change the blend mode to: Overlay.

Activate the top layer.

Open: Kristin - American Girl - Lollipop 2. C/p in the canvas, resize at 55 percent - Smart Size. Twice.
Place it in the bottom right.

Open: Kristin - American Girl - String. C/p in the canvas, resize at 60 percent - Smart Size. 
Place it in the bottom center.

Open: Kristin - American Girl - Ribbon. C/p in the canvas, resize at 60 percent - Smart Size. 
Place it in the bottom center.

Open: Kristin - American Girl - Flame. C/p in the canvas, resize at 55 percent - Smart Size. 
Place it in the bottom left side.

Open: Kristin - American Girl - Star Border. C/p in the canvas, resize at 55 percent - Smart Size. 
Place it in the bottom right side.

Open: Kristin - American Girl - Candy 2. C/p in the canvas, resize at 45 percent - Smart Size. 
Place it in the bottom left.

Open: Kristin - American Girl - Lips. C/p in the canvas, resize at 40 percent - Smart Size. 
Place it in the left side.

Open: Kristin - American Girl - Skull Cone. C/p in the canvas, resize at 45 percent - Smart Size. 
Place it in the bottom left side.

Open: Kristin - American Girl - Bow 1. C/p in the canvas, resize at 45 percent - Smart Size. 
Place it in the bottom right side.

Open: Kristin - American Girl - Flower 2. C/p in the canvas, resize at 55 percent - Smart Size. Twice.
Place it in the bottom center.

Open: Kristin - American Girl - Skull 2. C/p in the canvas, resize at 55 percent - Smart Size. Twice.
Image - Mirror. Place it in the bottom center.

Open: Kristin - American Girl - Butterfly. C/p in the canvas, resize at 40 percent - Smart Size. 
Place it in the top left.

Open: Kristin - American Girl - Sparkles. C/p in the canvas and place it in the bottom center.

Sharpen the elements and apply shadow.
Effects - Plugins - Eye Candy 4000 - Shadowlab:

Add the name and copyright info.

To animate:

Close the layers below the frame. (with this layer included)
Merge visible all the open layers. Rename it: 1. Close it.

Open the layers closed and copy merged. 

Open animation shop and paste as a new animation. Duplicate until you have 16 frames.

Open: SimoneAni473-MNG.mng
Activate the first frame, select all. 
Drag into the tag and place it in the bottom left.

Back to psp. Open the layer 1 and copy, paste as a new animation in animation shop.
Duplicate until you have 16 frames.
Activate the first frame, select all. Drag into the tag and place it where it belongs.

**Adding a background to the transparent animation.

Animation - Animation Properties
Change the back color for the color of your choice, mine is white.
Apply and the color will be applied in all the frames selected.

Change the speed to: 11, play the animation and save if you like! :)

22 junio 2013

Red, White & Blue


Supplies Needed:
Psp & Animation shop
Tube of choice. Art by Celineart, the tube is available here
Scrap kit 4th of July (PTU) by Celineart here
Mask 34 by Simone here
Animation 481 by Simone here
Plugins:
Eye candy 4000
Font here


Open a new image: 550x650.
Selections - All. 
Open: Celinart-4 July-paper 01. Copy and paste into the selection.
Layers - Load/Save Mask - Load Mask from the disk:

Merge group. Duplicate and merge visible. Resize at 95 - Bicubic.

Open: Celinart-4 July-usa_grunge 02. C/p in the canvas, resize at 75 percent - Smart Size. 
Place it in the center.

Open: Celinart-4 July-fire.  C/p in the canvas, resize at 85 percent - Smart Size. 
Place it in the center.

Open the tube, c/p in the canvas, resize if it's needed and place it in the center.
Effects - Plugins - Eye Candy 4000 - Shadowlab:


Open: Celinart-4 July- rocket. C/p in the canvas, resize at 70 percent - Smart Size. 
Image - Mirror. Place it in the bottom left.

Open: Celinart-4 July-USA star. C/p in the canvas, resize at 55 percent - Smart Size. 
Place it in the bottom right.

Open: Celinart-4 July-Tattoo Heart. C/p in the canvas, resize at 75 percent - Smart Size. 
Place it in the bottom right.

Open: Celinart-4 July-glitter. C/p in the canvas, resize at 60 percent - Smart Size. 
Place it in the bottom center.

Open: Celinart-4 July-ball 04. C/p in the canvas, place in the bottom right.

Open: Celinart-4 July-American. C/p in the canvas, resize at 75 percent - Smart Size. 
Place it in the bottom center.

Open: Celinart-4 July-Bow 03. C/p in the canvas, resize at 70 percent - Smart Size. 
Place it in the bottom center.

Open: Celinart-4 July-bow 01. C/p in the canvas. Image - Free Rotate: Right - 90 degrees. 
Place it in the bottom center.

Open: Celinart-4 July-usa hat 02. C/p in the canvas, place in the bottom left.

Open: Celinart-4 July-Cake. C/p in the canvas, resize at 60 percent - Smart Size. 
Place it in the bottom left.

Open: Celinart-4 July-satin bow 02. C/p in the canvas, resize at 85 percent - Smart Size. 
Image - Free Rotate: Left - 40 degrees. Place it in the top left.

Sharpen the elements and apply shadow.
Effects - Plugins - Eye Candy 4000 - Shadowlab:


Add the name and copyright info.

To animate:

Close the layers below the tube. (with this layer included)
Merge visible all the open layers. Rename it: 1. Close it.

Open the layers closed and copy merged. 

Open animation shop and paste as a new animation. Duplicate until you have 17 frames.

Open: SimoneAni481-MNG.mng
Activate the first frame, select all. 
Animation - Cull Animation - Remove 1 frame every 5 frames.
Drag into the tag and place it in the bottom center.

Back to psp. Open the layer 1 and copy, paste as a new animation in animation shop.
Duplicate until you have 17 frames.
Activate the first frame, select all. Drag into the tag and place it where it belongs.

**Adding a background to the transparent animation.

Animation - Animation Properties
Change the back color for the color of your choice, mine is white.
Apply and the color will be applied in all the frames selected.

Change the speed to: 12, play the animation and save if you like! :)

26 mayo 2013

PTU Tutorial by Carol: Goth in waiting

New PTU Tutorial by Carol with the scrapkit "Goth and Hot" by Disturbed Scraps here and a tube by Celineart here at SATC.

Check out the TUTORIAL: here

23 mayo 2013

Freebie Cluster and tag by Betty: Smile and be happy


NEW CT Cluster and Tags with my kit Smile & be happy available here or here,. Art by Verymany here and Celineart here @ SATC.

Download the cluster here


16 mayo 2013

Comic City


Supplies Needed:
Psp & Animation shop
Tube of choice. Art by Celineart, the tube is available here
Scrap kit Comic Girl (PTU) by Bibis Collections here
Animation 13 by me here or here
Mask 16 by Gems here
Plugins:
Eye candy 4000
Font here


Open a new image: 650x600.

Open: BIBICOMICGIRL ELEMS (64). C/p in the canvas, resize at 50 percent - Smart Size. 
Place it in the left side. Duplicate. merge visible. Duplicate. Image - Mirror. 
Arrange it in the right side. Merge visible.
Layers - Load/Save Mask - Load Mask from the disk:
Merge group. 

Open: BIBICOMICGIRL ELEMS (5).  C/p in the canvas, Place it in the center.

Open: BIBICOMICGIRL ELEMS (83). C/p in the canvas, resize at 80 percent - Smart Size. 
Place it in the bottom center.

Open: BIBICOMICGIRL ELEMS (23). C/p in the canvas, resize at 75 percent - Smart Size. 
Place it in the right side.

Open: BIBICOMICGIRL ELEMS (12). C/p in the canvas, resize at 75 percent - Smart Size. 
Place it in the center and eraser the parts you don't want.

Open: BIBICOMICGIRL ELEMS (84). C/p in the canvas. Place it in the bottom center.

Open: BIBICOMICGIRL ELEMS (15). C/p in the canvas, resize at 45 percent - Smart Size. 
Place it in the right side.

Open: BIBICOMICGIRL ELEMS (86). C/p in the canvas. Image - Mirror.
Place it in the left side and eraser the parts you don't want.

Open: BIBICOMICGIRL ELEMS (81). C/p in the canvas, resize at 75 percent - Smart Size. 
Place it in the bottom left. Duplicate. Image - Mirror. Place it in the left, above the first swirly doodle.

Open: BIBICOMICGIRL ELEMS (88). C/p in the canvas. Place it in the bottom center and eraser the parts you don't want.

Open: BIBICOMICGIRL ELEMS (71). C/p in the canvas, resize at 75 percent - Smart Size. 
Place it in the bottom left and eraser the parts you don't want.

Open: BIBICOMICGIRL ELEMS (32). C/p in the canvas. Image - Mirror. 
Place it in the bottom left.

Open: BIBICOMICGIRL ELEMS (75). C/p in the canvas, resize at 70 percent - Smart Size. 
Place it in the bottom left.

Open: BIBICOMICGIRL ELEMS (43). C/p in the canvas, resize at 80 percent - Smart Size. 
Place it in the bottom left, in the middle of the cd.

Open: BIBICOMICGIRL ELEMS (25). C/p in the canvas, resize at 50 percent - Smart Size. 
Place it in the top left.

Open: Open the tube, c/p in the canvas, resize if it's needed and place it in the  left side.
Effects - Plugins - Eye Candy 4000 - Shadowlab:

Open: BIBICOMICGIRL ELEMS (20). C/p in the canvas, resize at 50 percent - Smart Size. 
Place it in the top right.

Open: BIBICOMICGIRL ELEMS (7). C/p in the canvas. Place it in the top center. 
Duplicate and place it in the bottom center.

Sharpen the elements and apply shadow.
Effects - Plugins - Eye Candy 4000 - Shadowlab:

Add the name and copyright info.

To animate:

Close all the layers below the element: BIBICOMICGIRL ELEMS (23) (with this layer included)
Merge visible all the open layers. Rename it: 1. Close it.

Open the layers closed and copy merged. 

Open animation shop and paste as a new animation. Duplicate until you have 18 frames.

Open: Animation13 by Gaby.mng
Activate the first frame, select all. 
Animation - Cull Animation - Remove 1 frame every 4 frames.
Drag into the tag and place it in the center.

Back to psp. Open the layer 1 and copy, paste as a new animation in animation shop.
Duplicate until you have 18 frames.
Activate the first frame, select all. Drag into the tag and place it where it belongs.

**Adding a background to the transparent animation.

Animation - Animation Properties
Change the back color for the color of your choice, mine is white.
Apply and the color will be applied in all the frames selected.

Change the speed to: 12, play the animation and save if you like! :)

12 mayo 2013

Geek Boom


Supplies Needed:
Psp & Animation shop
Tube of choice. Art by Celineart, the tube is available here
Scrap kit Geek (FTU) by SkyScraps here
Animation 160 by Simone here
Plugins:
Eye candy 4000
Font here


Open a new image: 650x550.
Open: SS-E6. C/p in the canvas, resize at 75 percent - Smart Size.
Place it in the center. Adjust - Add/Remove Noise - Add Noise:
Random
30 percent
Monochrome

Open: SS-E2. C/p in the canvas, resize at 75 percent - Smart Size.
Place it in the center. With the magic wand click inside of the frame and expand the selection: 5 pixels.

Open: SS-PP3. C/p in the canvas, resize at 80 percent - Smart Size.
Place it below the frame. Selections - Invert. Edit - Clear. Selections - Invert.

Open the tube, c/p in the canvas, resize if it's needed and place it in the center.
Selections - Invert. Edit - Clear. Deselect.
Effects - Plugins - Eye Candy 4000 - Shadowlab:

Activate the magic wand again and click inside of the small stars in the right side,
expand the selection: 3 pixels. Open: SS-PP1. C/p in the canvas, resize at 60 percent - Smart Size.

Open the close up of the tube, copy and paste into each star. 
In the layer palette change the blend mode to: Luminance (L).

Activate the top layer.
Open: SS-E8. C/p in the canvas, resize at 85 percent - Smart Size.
Place it in the center.

Open: SS-E11. C/p in the canvas, resize at 50 percent - Smart Size.
Image - Mirror. Image- Flip. Place it in the bottom center.

Open: SS-E16. C/p in the canvas, resize at 45 percent - Smart Size.
Place it in the bottom left.

Open: SS-E12. C/p in the canvas, resize at 50 percent - Smart Size.
Place it in the bottom left.

Open: SS-E31. C/p in the canvas, resize at 45 percent - Smart Size.
Image - Mirror. Place it in the bottom left.

Open: SS-E14. C/p in the canvas, resize at 50 percent - Smart Size. Twice.
Place it in the bottom left.

Open: SS-E30. C/p in the canvas, resize at 50 percent - Smart Size. 
Image - Free Rotate: Left - 25 degrees. Place it in the left side.

Open: SS-E29. C/p in the canvas, resize at 40 percent - Smart Size. 
Image - Free Rotate: Right - 20 degrees. Place it in the left side.

Open: SS-E27. C/p in the canvas, resize at 50 percent - Smart Size. 
Place it in the bottom left.

Open: SS-E28. C/p in the canvas, resize at 60 percent - Smart Size. Twice.
Place it in the bottom left.

Open: SS-E18. C/p in the canvas, resize at 40 percent - Smart Size. 
Place it in the top left.

Sharpen the elements and apply shadow.
Effects - Plugins - Eye Candy 4000 - Shadowlab:

Add the name and copyright info.

To animate:

Close the layers below the paper. (with this layer included)
Merge visible all the open layers. Rename it: 1. Close it.

Open the layers closed and copy merged. 

Open animation shop and paste as a new animation. Duplicate until you have 17 frames.

Open: SimoneAni160-mng.mng
Activate the first frame, select all. 
Animation - Cull Animation - Remove 1 frame every 5 frames.
Drag into the tag and place it in the right side.

Back to psp. Open the layer 1 and copy, paste as a new animation in animation shop.
Duplicate until you have 17 frames.
Activate the first frame, select all. Drag into the tag and place it where it belongs.

**Adding a background to the transparent animation.

Animation - Animation Properties
Change the back color for the color of your choice, mine is white.
Apply and the color will be applied in all the frames selected.

Change the speed to: 12, play the animation and save if you like! :)

14 marzo 2013

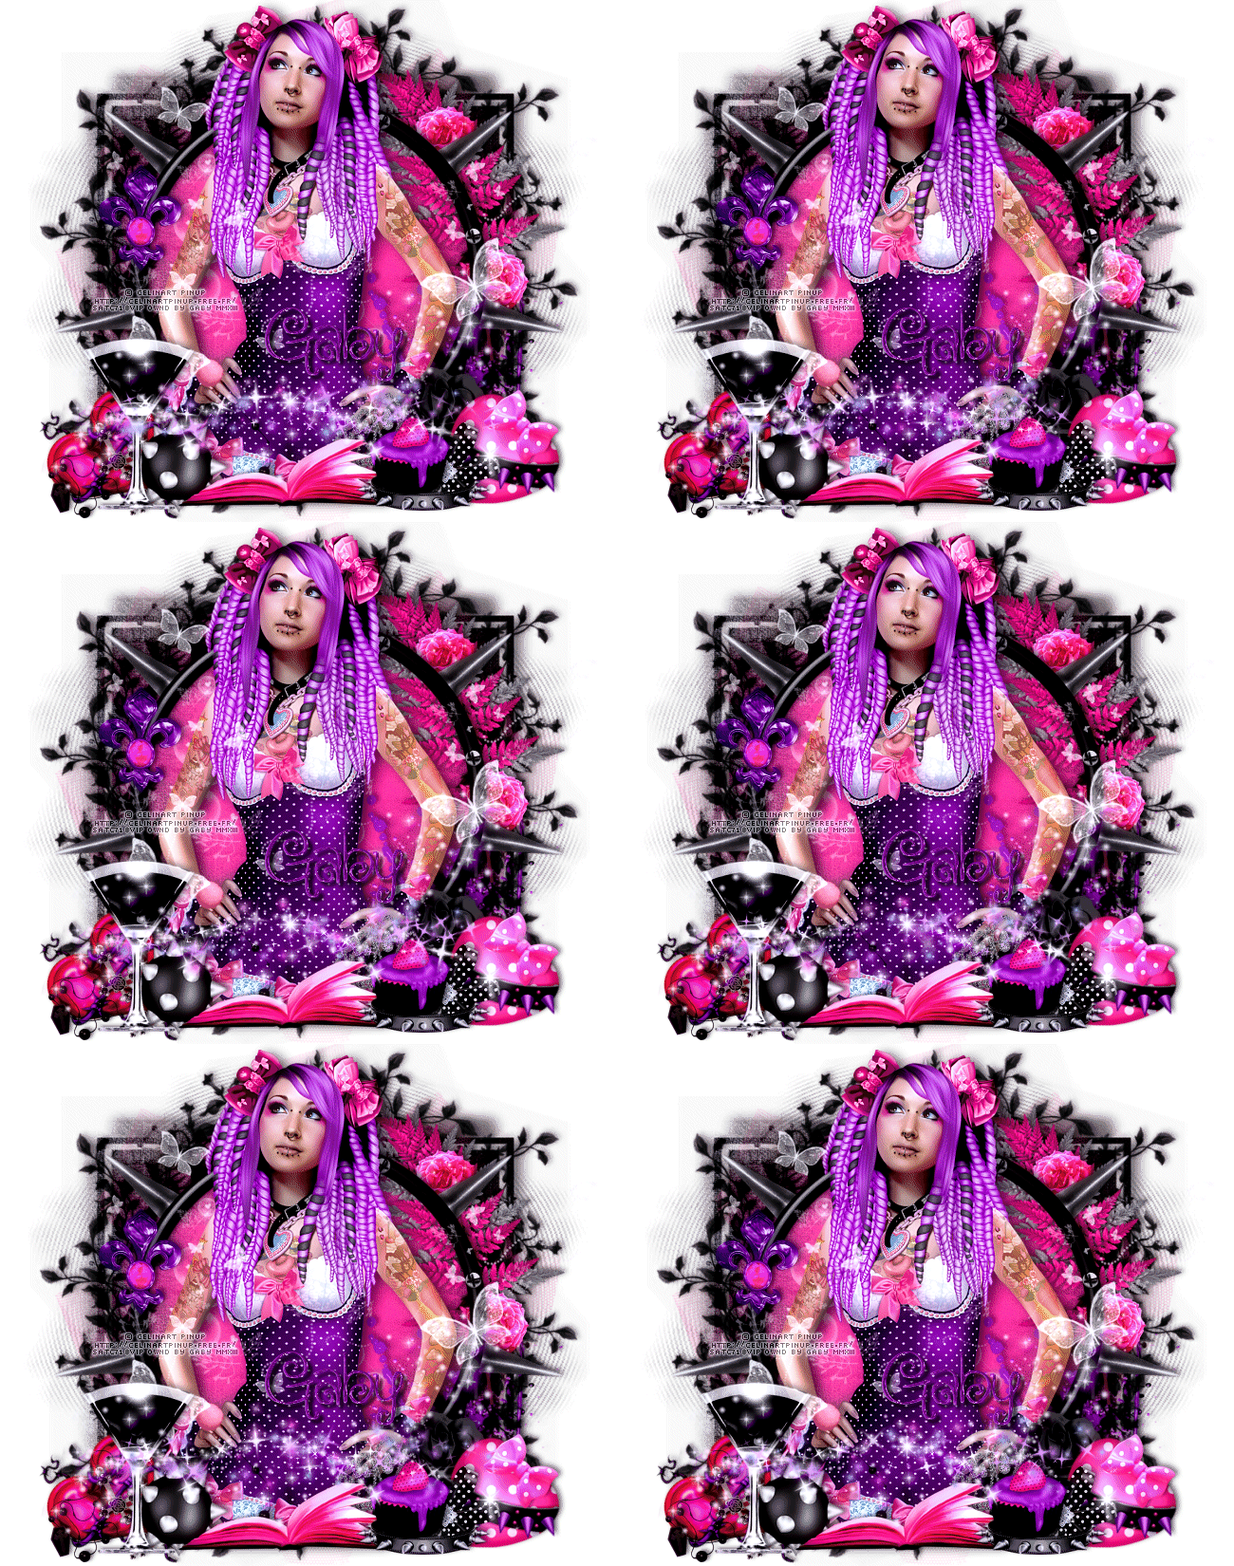
Toxic Candy Princesse


Supplies Needed:
Psp & Animation shop
Tube of choice. Art by Celine, the tube is available here
Scrap kit Princesse (PTU) by Bibis Collection here
Mask 3 by Urban Fairy Tales here
Animation 334 by Simone here 
Plugins:
Eye candy 4000
Font here


Open a new image: 650x550.

Open: BIBIPRINCESSE PAPERS (6). C/p in the canvas, resize at 60 percent - Smart Size.
Layers - Load/Save Mask - Load Mask from the disk:

Merge group. 

Open: BIBIPRINCESSE ELEM (61). C/p in the canvas, place it in the center. 


Open: BIBIPRINCESSE ELEM (96). C/p in the canvas, resize at 60 percent - Smart Size.
place it in the bottom left side.

Open: BIBIPRINCESSE ELEM (60). C/p in the canvas, resize at 80 percent - Smart Size.
place it in the bottom right side.

Open: BIBIPRINCESSE ELEM (78). C/p in the canvas, resize at 85 percent - Smart Size.
place it in the center. Duplicate. Image - Flip. Image - Mirror.

Open: BIBIPRINCESSE ELEM (4). C/p in the canvas, resize at 60 percent - Smart Size.
Place it in the top right.

Open: BIBIPRINCESSE ELEM (2). C/p in the canvas, resize at 55 percent - Smart Size.
Image - Mirror. Place it in the top right, above the grey leaves.

Open: BIBIPRINCESSE ELEM (42). C/p in the canvas, resize at 45 percent - Smart Size. Twice.
Place it in the top right, above the leaves. Duplicate. Image - Mirror. place it below the first rose.

Open: BIBIPRINCESSE ELEM (5). C/p in the canvas, resize at 85 percent - Smart Size.
Place it in the center.

Open the tube c/p in the canvas and place it in the center.
Effects - Plugins - Eye Candy 4000 - Shadowlab:


Open: BIBIPRINCESSE ELEM (50). C/p in the canvas, resize at 60 percent - Smart Size.
Place it in the center.

Open: BIBIPRINCESSE ELEM (31). C/p in the canvas, resize at 55 percent - Smart Size. Twice.
Place it in the bottom right side.

Open: BIBIPRINCESSE ELEM (70). C/p in the canvas, resize at 40 percent - Smart Size.
Place it in the bottom right.

Open: BIBIPRINCESSE ELEM (34). C/p in the canvas, resize at 55 percent - Smart Size. Twice.
Image - Free Rotate: Right - 50 degrees.  Place it in the bottom right corner. 

Open: BIBIPRINCESSE ELEM (38). C/p in the canvas, resize at 40 percent - Smart Size.
Image - Mirror. Place it above the heart.

Open: BIBIPRINCESSE ELEM (34). C/p in the canvas, resize at 40 percent - Smart Size. 
Image - Free Rotate: Left - 45 degrees.  Place it in the bottom left corner. 

Open: BIBIPRINCESSE ELEM (67). C/p in the canvas, resize at 40 percent - Smart Size. 
Place it in the bottom left. 

Open: BIBIPRINCESSE ELEM (55). C/p in the canvas, resize at 70 percent - Smart Size. 
Place it in the bottom left. 

Open: BIBIPRINCESSE ELEM (64). C/p in the canvas, resize at 70 percent - Smart Size. 
Place it in the bottom left. 

Open: BIBIPRINCESSE ELEM (13). C/p in the canvas, resize at 45 percent - Smart Size. 
Place it in the bottom center.

Open: BIBIPRINCESSE ELEM (77). C/p in the canvas, resize at 60 percent - Smart Size. 
Place it in the bottom right, next to the open book.

Open: BIBIPRINCESSE ELEM (40). C/p in the canvas, resize at 50 percent - Smart Size. 
Place it in the bottom right, above the spiked collar.

Open: BIBIPRINCESSE ELEM (44). C/p in the canvas, resize at 55 percent - Smart Size. Twice. 
Place it in the bottom right, above the spiked collar and next to the flower.

Open: BIBIPRINCESSE ELEM (51). C/p in the canvas, resize at 50 percent - Smart Size. 
Place it in the middle left side.

Open: BIBIPRINCESSE ELEM (8). C/p in the canvas, place it in the bottom center.

Open: BIBIPRINCESSE ELEM (73). C/p in the canvas, place it in the bottom center.

Sharpen the elements and apply shadow.
Effects - Plugins - Eye Candy 4000 - Shadowlab:


Add the name and copyright info.

To animate:
Copy merged the tag. Open animation shop: 
Paste as a new animation and duplicate until you have 17 frames.

Open: SimoneAni334.mng
Animation - Cull Animation: Remove 1 frame every 5 frames.
Activate the first frame, select all. 
Drag the animation into the tag and place it at the bottom center.


**Adding a background to the transparent animation.

Animation - Animation Properties
Change the black color for the color of your choice, mine is white:

Apply and the color will be applied in all the frames selected.

Change the speed to: 12, play the animation and save if you like! :)