29 abril 2013

Playful Eyes


Supplies Needed:
Psp & Animation shop
Tube of choice. Art by NaSionainne, the tube is available here
Scrap kit Kaulana (PTU) by Kizzed by Kelz here
Animation 115 by Simone here 
Plugins:
Eye candy 4000
Font here


Open a new image: 650x500.
Open: cloud. C/p in the canvas. Place it in the left side.
Duplicate. Image - Flip. Image - Mirror. Arrange in the right side.

Open: barbwire. C/p in the canvas. Place it in the top center.

Open: frame. C/p in the canvas. Place it in the left side.
Duplicate. Image - Mirror. Arrange it in the right side and merge the frames together.
With the magic wand click inside of the frames, expand the selection: 10 pixels.

Open: Paper 4. C/p in the canvas, resize at 60 percent - Smart Size.
Place it below the frame.

Open: Paper 7. C/p in the canvas, resize at 70 percent - Smart Size.
Selections - Invert. Edit - Clear. Selections - Invert. For the two paper layers.
Change the blend mode of the layer to: Overlay.

Open the close up of the tube, c/p in the canvas, place it in the left frame.
Selections - Invert. Edit - Clear. Deselect.
Change the blend mode of the layer to: Hard Light.

Effects - Texture Effects - Blinds:

Open the tube, c/p in the canvas, resize if it's needed and place it in the center.
Effects - Plugins - Eye Candy 4000 - Shadowlab:


Open: chained heart. C/p in the canvas, resize at 50 percent - Smart Size.
Place it in the right side.

Open: briefcase. C/p in the canvas, resize at 40 percent - Smart Size.
Place it in the right side.

Open: heart wings. C/p in the canvas, resize at 60 percent - Smart Size.
Place it in the right side.

Open: torn heart. C/p in the canvas, resize at 50 percent - Smart Size. Twice.
Place it in the left side.

Open: purse. C/p in the canvas, resize at 50 percent - Smart Size. 
Place it in the left side.

Open: heart n sword. C/p in the canvas, resize at 40 percent - Smart Size. 
Image - Mirror. Place it in the left side.

Open: lips.  C/p in the canvas, resize at 50 percent - Smart Size. Twice.
Place it in the bottom center.

Open: charm. C/p in the canvas, resize at 70 percent - Smart Size. 
Place it in the bottom center.

Open: rose petals 2. C/p in the canvas, resize at 40 percent - Smart Size. 
Place it in the bottom right.

Open: heart doodle. C/p in the canvas. Place it in the bottom center.
Erase any part that is needed.

Open: perfume. C/p in the canvas, resize at 55 percent - Smart Size. Twice.
Place it in the bottom left corner.

Open: rose. C/p in the canvas, resize at 50 percent - Smart Size. Twice.
Image - Mirror.  Place it in the bottom left.

Open: handcuffs. C/p in the canvas, resize at 50 percent - Smart Size. Twice.
Image - Mirror.  Place it in the bottom left.

Open: star sparkle. C/p in the canvas. Image - Free Rotate: Left - 50 degrees. 
Place it in the bottom center.

Sharpen the elements and apply shadow.
Effects - Plugins - Eye Candy 4000 - Shadowlab:

Add the name and copyright info.

To animate:

Copy merged the tag. Open animation shop: 
Paste as a new animation and duplicate until you have 18 frames.

Open: SimoneAni115-SpinningFlareRed-MNG.mng
Activate the first frame, select all.
Animation - Rotate: Right - 90 degrees.
Animation - Cull Animation: Remove 1 frame every 2 frames.
Drag into the tag and place it in the top right side. Back to the animation, undo the drag action
and drag the animation again into the tag but place it in the bottom left.


**Adding a background to the transparent animation.

Animation - Animation Propieties
Change the black color for the color of your choice, mine is white.
Apply and the color will be applied in all the frames selected.

Change the speed to: 12, play the animation and save if you like! :)

New PTU Kit: Summertime Sunset


ღNEW KITღ 
Tagger size kit: 86 unique elements and 15 papers (800x800 pixels)
I hope you like it :)
Find the kit at SATC here & PFD here


Tutorials by Isa & Carol: Katy & Kitty


Tutorial with this gorgeous tube by Diana Gali and my matching scrap kit only @ SATC.
Tube is here & scrap kit here
Find the tutorial here


Another tutorial withby by Carol from Nora's Den
Find the tutorial here

Thank you for this beautiful creations ♥

New Tutorials by Lorraine & Misty Lynn

PTU tutorial in english by Misty Lynn with Beautiful PTU Tutorial written with the tube Amanda available here and my matching kit available here.
Find the tutorial here


PTU Animated Tutorial in english here by Lorraine with my kit "Dark Love Memories", find the kit at SATC here & PFD here. Tube by Marc Duval: here
it's gorgeous, thank you :)

27 abril 2013

New Tutorials by Puri: Dark Love and Katy & Kitty


I want to share this amazing tutorial here created by Puri with my kit and the art of Elias Chatzoudis,  the kit is available at SATC here & PFD here
Thank you for this beauty :)


Another tutorial with this sweet tube by Diana Gali and my matching scrap kit only @ SATC.
Tube is here & scrap kit here
Find the tutorial here


25 abril 2013

PTU Exclusive kit: Katy & Kitty


ღNEW EXCLUSIVE KITღ 
Tagger size: 118 Unique Elements and 16 papers (800x800 pixels) 
Bonus: 10 glitter tiles (800x800 pixels) 
I hope you like it!! :)
Find the kit here The tube is here


23 abril 2013

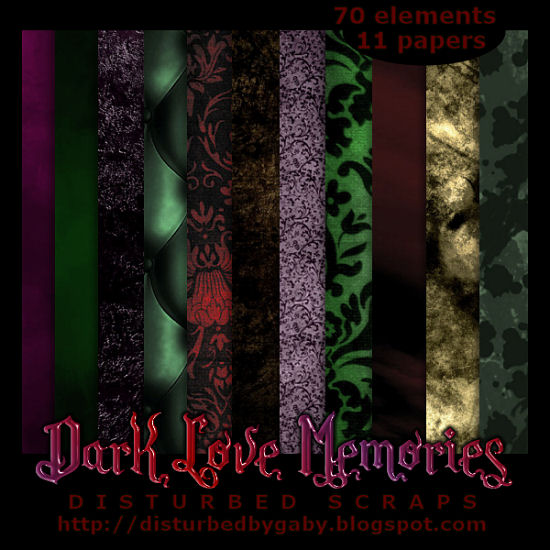
New PTU Kit: Dark Love Memories


ღNEW  KITღ 
Tagger size: 70 Unique Elements and 11 papers (800x800 pixels) 
A mix of dark and vintage. I hope you like it!! :)
Find it here or here


New Tutorial by Isa: Roxy Rocker

I want to share this rockin' tutorial by Isa with my kit and the awesome tube by Diana Gali, both availables at SATC tube here & scrap here
Thank you for your creativity and gorgeous work ♥

Find the tutorial here


Dramatic Blanche


Supplies Needed:
Psp & Animation shop
Tube of choice. Art by SkyScraps, the tube is available here
Scrap kit Blanche (PTU) by Scrapz N Pleasure here
Mask 21 by Urban Fairy here
Animation 45 by Simone here 
Plugins:
Eye candy 4000
Font here


Open a new image: 650x500

Open: snp-blanche-elements46. C/p in the canvas, place it in the top left.
Duplicate. Image - Mirror. Image - Flip. Arrange it in the bottom right.

Open: snp-blanche-papers03. C/p in the canvas, resize at 85 percent - Smart Size.

Layers - Load/Save Mask - Load Mask from the disk:
Merge group. 

Open: snp-blanche-elements02. C/p in the canvas, resize at 55 percent - Smart Size. Twice.
Place it in the bottom left corner of the mask.

Open: snp-blanche-elements06. C/p in the canvas, resize at 65 percent - Smart Size.
Place it in the bottom right side.

Open: snp-blanche-elements47. C/p in the canvas, resize at 65 percent - Smart Size.
Place it in the right side.

Open: snp-blanche-elements4. C/p in the canvas. Place it in the left side.

Open the tube, c/p in the canvas, resize if it's needed and place it in the right side.
Effects - Plugins - Eye Candy 4000 - Shadowlab:

Open: snp-blanche-elements51. C/p in the canvas, resize at 40 percent - Smart Size. Twice.
Place it in the bottom right.

Open: snp-blanche-elements40. C/p in the canvas, resize at 75 percent - Smart Size. 
Image - Free Rotate: Left - 90 degrees. Place it in the bottom center.

Open: snp-blanche-elements09. C/p in the canvas, resize at 45 percent - Smart Size. Twice.
Place it in the bottom right.

Open: snp-blanche-elements49. C/p in the canvas, resize at 55 percent - Smart Size. Twice.
Place it in the bottom left.

Open: snp-blanche-elements43. C/p in the canvas, resize at 50 percent - Smart Size. 
Image - Free Rotate: Left - 30 degrees. Place it in the bottom left.

Open: snp-blanche-elements05. C/p in the canvas, resize at 45 percent - Smart Size. 
Image - Free Rotate: Left - 20 degrees. Place it in the bottom center.

Open: snp-blanche-elements29. C/p in the canvas, resize at 40 percent - Smart Size. 
Image - Mirror. Image - Flip. Image - Free Rotate: Left - 30 degrees. 
Place it in the bottom left corner. duplicate and move it to the bottom center.

Open: snp-blanche-elements17. C/p in the canvas, resize at 40 percent - Smart Size. 
Image - Free Rotate: Left - 90 degrees. Place it in the bottom center.

Open: snp-blanche-elements35. C/p in the canvas, resize at 55 percent - Smart Size. Twice.
Place it in the bottom right.

Open: snp-blanche-elements33. C/p in the canvas. Place it in the right side.

Open: snp-blanche-elements44. C/p in the canvas, resize at 40 percent - Smart Size. 
Place it in the bottom right in front of the stumps.

Open: snp-blanche-elements36. C/p in the canvas, resize at 50 percent - Smart Size. Twice.
Place it in the bottom left.

Open: snp-blanche-elements39. C/p in the canvas, resize at 50 percent - Smart Size. Twice.
Place it in the bottom left.

Open: snp-blanche-elements4. C/p in the canvas. 
Image - Free Rotate: Left - 90 degrees. Place it in the bottom center.

Open: snp-blanche-elements08. C/p in the canvas, resize at 45 percent - Smart Size. Twice.
Place it in the bottom right.

Open: snp-blanche-elements03. C/p in the canvas, resize at 45 percent - Smart Size. Twice.
Place it in the bottom center.

Sharpen the elements and apply shadow.
Effects - Plugins - Eye Candy 4000 - Shadowlab:

Add the name and copyright info.

To animate:

Copy merged the tag. Open animation shop: 
Paste as a new animation and duplicate until you have 18 frames.

Open: SimoneAni-45-HeartsInCircle.psd
Activate the first frame, select all.
Animation - Resize at 85 bicubic. 
Animation - Cull Animation: Remove 1 frame every 2 frames.
Drag into the tag and place it in the right side.

**Adding a background to the transparent animation.

Animation - Animation Propieties
Change the black color for the color of your choice, mine is white.
Apply and the color will be applied in all the frames selected.

Change the speed to: 12, play the animation and save if you like! :)

21 abril 2013

New tutorials with the kit: Roxy Rocker

I want to share this amazing tutorials created with my kit and the awesome tube by Diana Gali, both availables at SATC tube here & scrap here
Thank you for your time and work ♥

Beautiful tutorial by Lorraine here


Fun Tutorial in Spanish by Puri here

Rockin' Tutorial by Lees Creationz here